How to integrate payment gateway with Contact Form 7?
Wondering how to integrate payment gateway with Contact Form 7 ? We have got you covered!. Contact Form 7 enables seamless transactions directly through your website. This process streamlines the payment process for customers, enhancing user experience and boosting conversions.
Follow these steps to effortlessly integrate payment gateway:
- Choose a Payment Gateway: Select a suitable payment gateway provider that aligns with your business needs and supports Contact Form 7 integration. Kindly check the documentation for checking which payment gateways Contact Form 7 supports.
- Install Contact Form 7 Plugin: If you haven’t installed the Contact Form 7 plugin, then first install and activate the Contact Form 7 plugin on your WordPress website. This versatile plugin allows you to create and manage custom contact forms easily.
- Install Payment Gateway Extension: Look for a payment gateway extension compatible with Contact Form 7. Install and activate the extension to extend the plugin’s functionality to accept payments. Some of the payement plugins that Contact Form 7 support are Knitpay, Razaorpay etc, you can choose the plugin according to the compatibility with Contact Form 7 and your business needs.
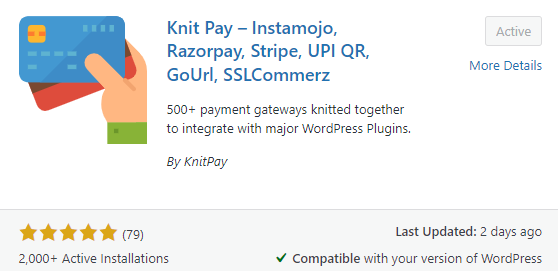
 We will be using KnitPay for integrating with Contact Form 7 .
4. Configure Payment Settings: To successfully integrate payment gateway navigate to the settings of the payment gateway extension. Choose the Configration option below Knitpay plugin and then select Add New on top of page for adding payment gateway configration.

5. Adding New Payment Gateway Configration: Kindly enter the title of the Configration Ex WebSite Payment Gateway etc and select a payment service provider according to your needs. Ex Instamojo, Manual, PayU, Razorpay, Stripe etc. Enter all the required information suc as such as API keys and merchant ID and click on publish to save all the details.

6. Create Payment Form: Within Contact Form 7, design a payment form by adding fields for essential information like customer name, email, billing address, and payment amount.

7. Adding Redirection: Now go to the contact form 7 plugin and choose the form in which you want to integrate the payment gateway.

Now click on the Actions Tab and choose KnitPay Payment from teh Choose Action drop-down and click on Add Action, after that click on save. This will automatically now redirect the form to Payment gateway once the user clicks submit button after filling the form. While adding the action user can specify an amount for every transaction that will be paid by the user.

8. Test Transactions: Before making your payment form live, conduct test transactions to ensure seamless functionality. Use sandbox or test mode provided by your payment gateway to simulate transactions without charging real money.
9. Go Live: Once you’re confident with the setup and testing, activate your payment form on your website. Customers can now make payments directly through Contact Form 7, enhancing convenience and boosting conversions.
By seamlessly integrating a payment gateway with Contact Form 7, you empower your website to accept payments efficiently, providing a smoother experience for your customers and ultimately driving business growth.
Quick Links
© 2024 Copyright Rank To Top

